When creating locations, there are a few options in which you can designate the area on the map. Below is an explanation of each tool one can use from the Location Toolbar:
- note: the Rectangle will always be on a fixed North-South orientation.
| |
Below is an example of what each tool looks like on a map:
The Shape Options tool at the bottom of the Location Toolbar allows you to customize colors for the polytools to stay consistent with branding. You can also toggle to show the marker icon in addition to the polygon.
Choose between dashed or solid for your stroke to create different style paths on your campus!
To adjust existing polygons/polylines, click and drag a white node to move around. Click on the white node once to remove the node without removing the entire polygon/polyline.
Directional arrows on lines and shapes
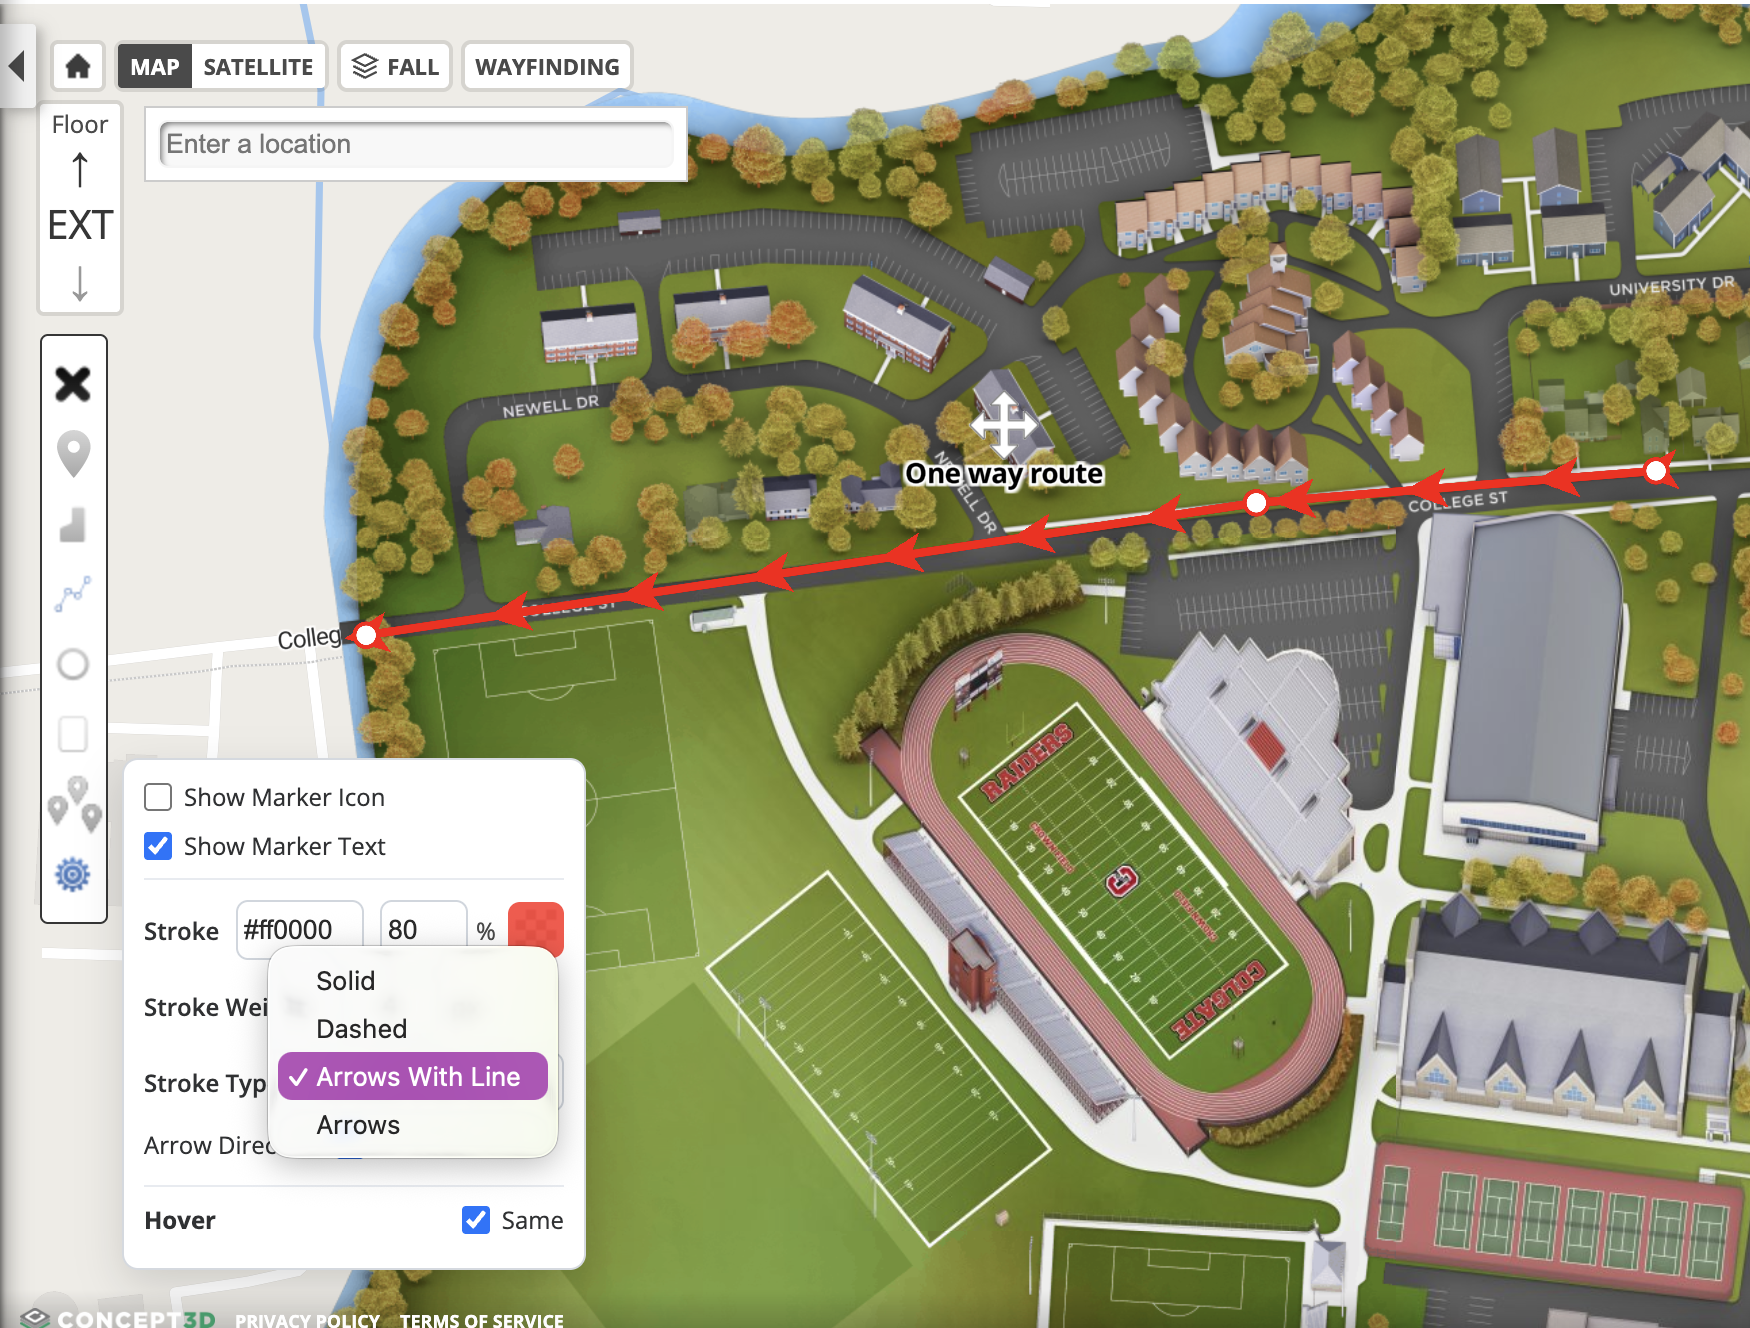
Use the native arrow controls in Shape Options to show direction on paths and other outlines. This replaces the older manual arrow-drawing method.
Choose an arrow style
- Create or select a polyline, polygon, circle, or rectangle.
- Open Shape Options.
- Under Stroke Type, choose one of the arrow styles:
- Arrows With Line shows chevrons on a connecting line.
- Arrows shows chevrons without a connecting line.
Add and control arrows
- For solid or dashed polylines, use Endpoint Arrow to add an arrow at the start, end, or both ends of the line.
- Use Reverse to flip the direction of the arrows.
- Arrows use the same color as the line stroke.
- Arrow styling also works on polygon, circle, and rectangle outlines.
Save the location revision and publish it when you are ready for the directional styling to appear on the live map.