OVERVIEW
Using your map as the foundation, Map Tours allows you to create everything from a walking site tour to a guide for specific events and information.
See how it's done here:
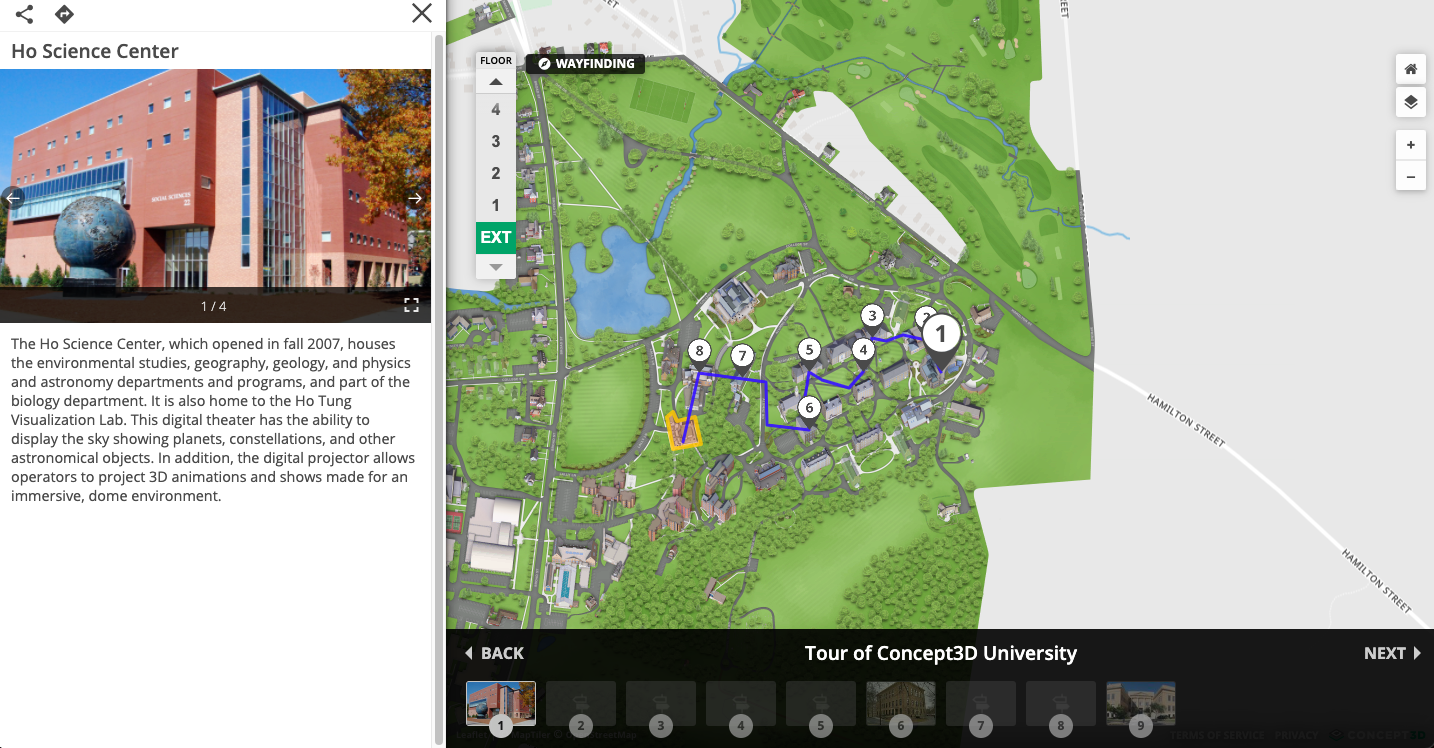
Map Tours tours can be customized with photos, videos, audio, and more. Through the Content Management System (CMS), you can create unlimited Map Tours. It puts you in control to generate additional media content for your online and on-site visitors.
CREATING A MAP TOUR
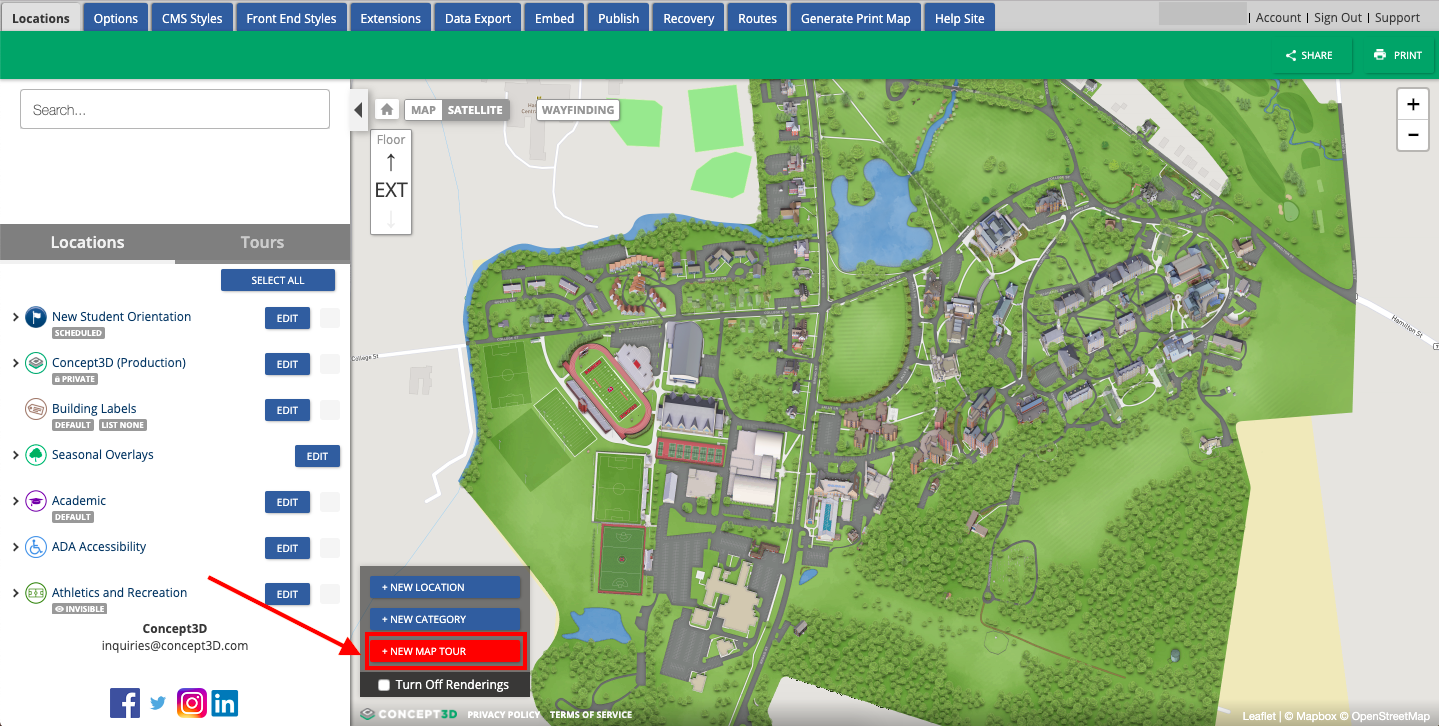
1. Once logged into the Content Management System (CMS), select the New Map Tour button located in the bottom left.
2. Choose the settings for the tour.
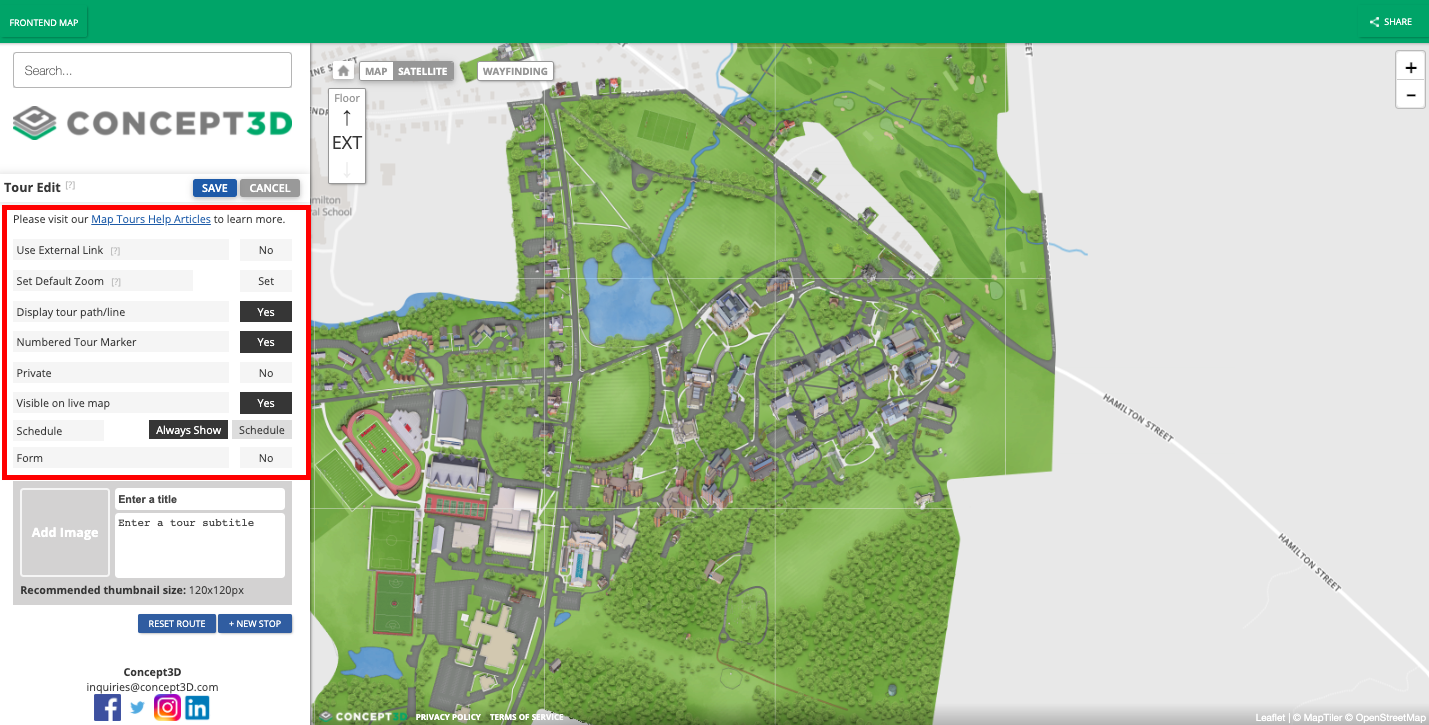
- Use External Link add a URL to launch an external tour.
- Set Default View set the zoom level and map placement for users when they first open the tour. Pan the map around to the desired view and click set.
- Display Tour Path/Line will display a walking path of the tour. You can manipulate this with the white nodes to follow specific sidewalks.
- Numbered Tour Marker shows a user which stop they are on by displaying numbered marker icons at each tour stop.
- Private keep your tour hidden from front end users, and share the tour with a specific URL.
- Visible If set to no a front end user will not be able to access the tour.
- Schedule set a date and time when the tour will be available on the front end of the map.
3. Add a thumbnail image, title of the tour and brief description - this information will display in the sidebar under the Tours tab.
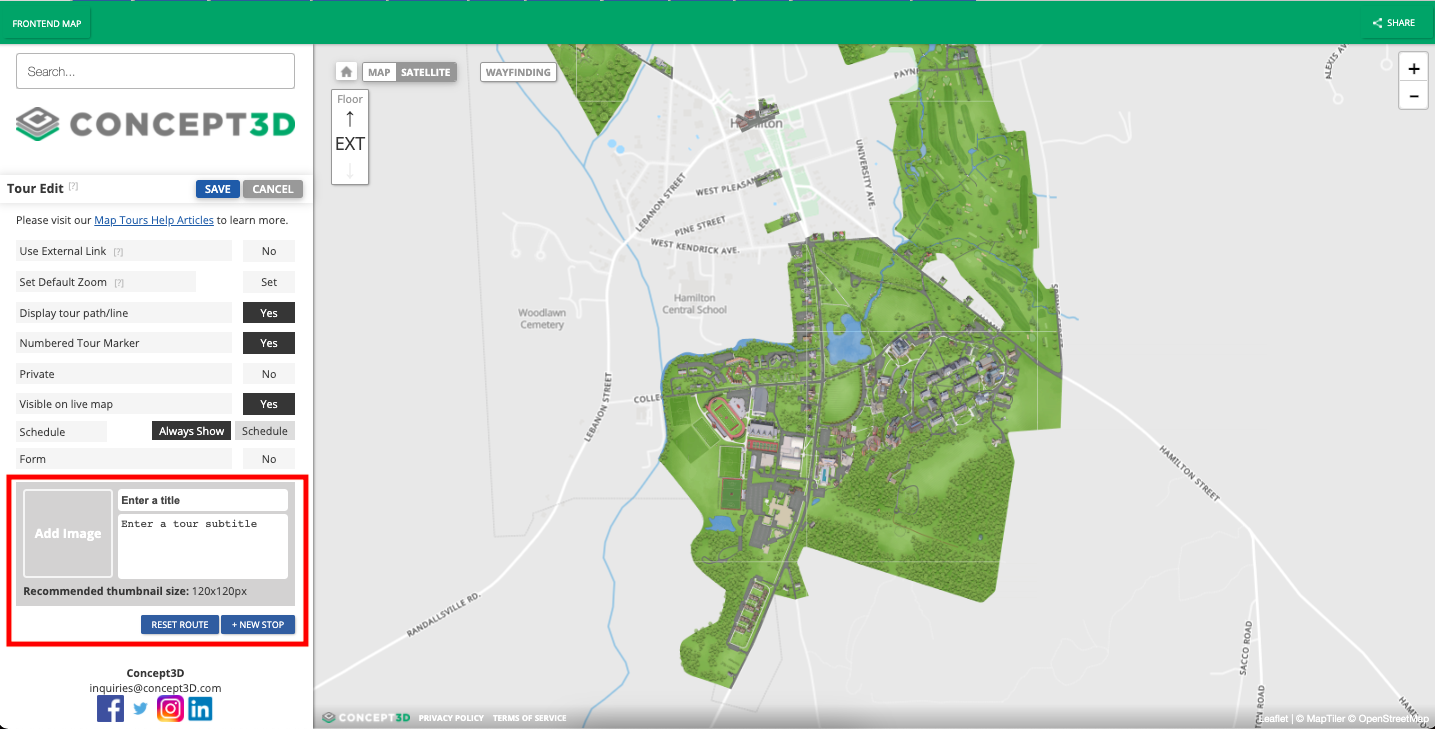
4. To create stops along the tour, choose existing pins on the map or create new ones. To select existing locations, click on the corresponding location marker, and the tour stops will be created. If needed, re-arrange the stops by dragging and dropping.
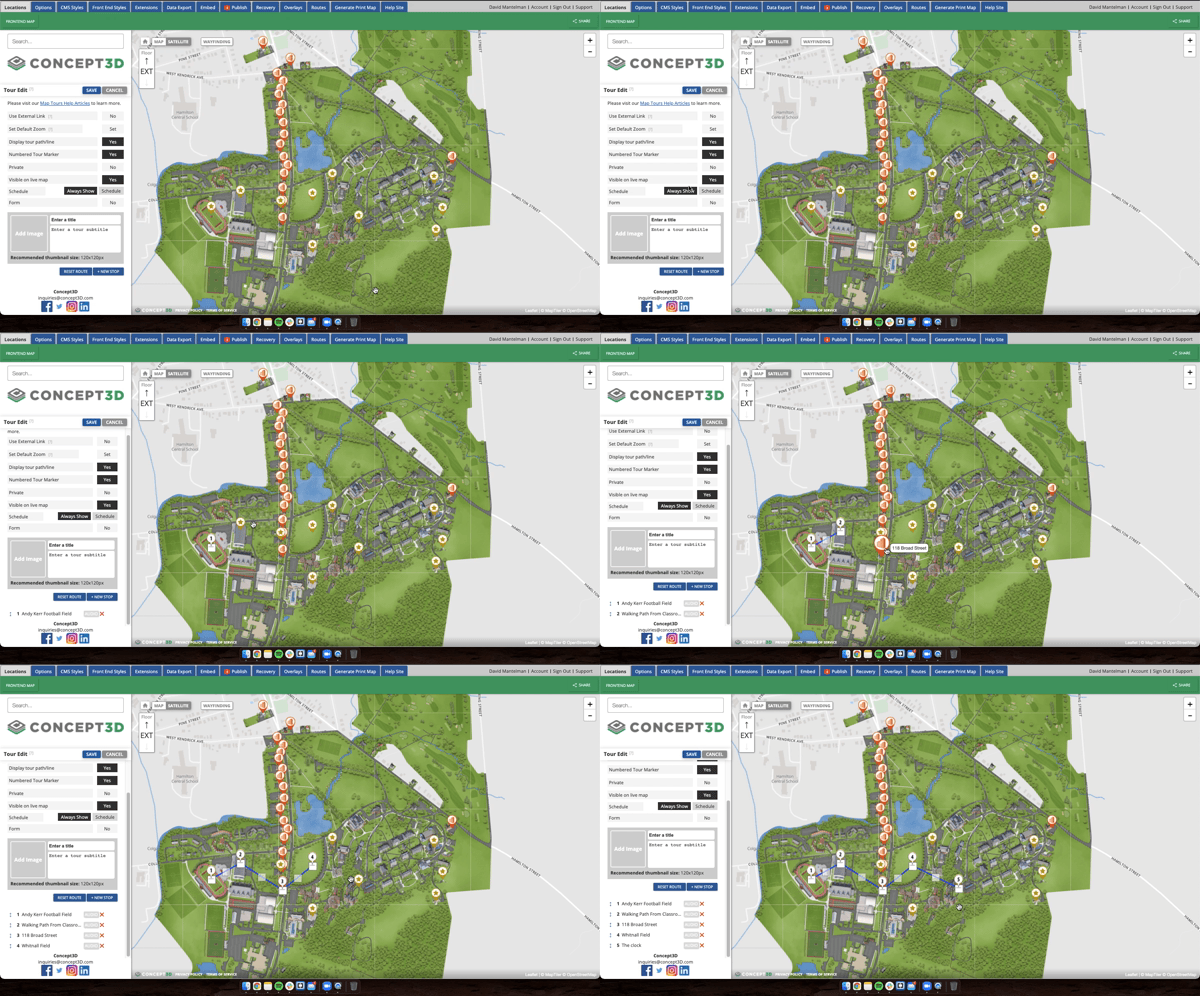
5. To create a new tour stop that is not otherwise on the map, select the new stop button. For a new stop, create a title, enter a description, and include any supporting media.
To place the location marker on the map, click the marker icon and then click the point on the map where the marker should go. Do not drag and drop. Once on the map, move the marker around as needed. You can also use the polygon or other shape tools.
NOTE: This tour stop will only be on the existing tour and will not be available on the map otherwise.
6. Would you like to add audio to your map tour? Add an audio transcript in the location description or match the location description text in the audio for the best accessibility experience. Click on the audio button next to your stop to add.
7. Save and Publish the tour!
SORT & GROUP MAP TOURS
Sorting and grouping your tours is a great way to keep the tours tab organized, and allow users to quickly find the tour they are interested in.
How to Sort Tours
1. Log into the CMS
2. Navigate to the Tours Tab
3. Select the Sort Tours button
4. Drag and drop to rearrange the tours
5. Save and Publish!
How to Group Tours
1. Log into the CMS
2. Navigate to the Tours Tab
3. Select the Sort Map Tours button
4. Select New Group and create a name for your tour grouping
5. Once you have a new group created, drag and drop the tours that belong in that grouping. Make sure they are indented over to the right of the grouping name.
6. Save and Publish!