Tags (formerly Labels) are internal-only values you can use to group locations and categories for filtering and Bulk Edit in Location Manager. They do not control the text labels displayed on the map. Tags are especially helpful when related locations belong to different categories.
How to Add Tags to a Single Location or Category
- Create a new or edit an existing category/location and find the Tags field near the bottom, below the Integrations & data heading.
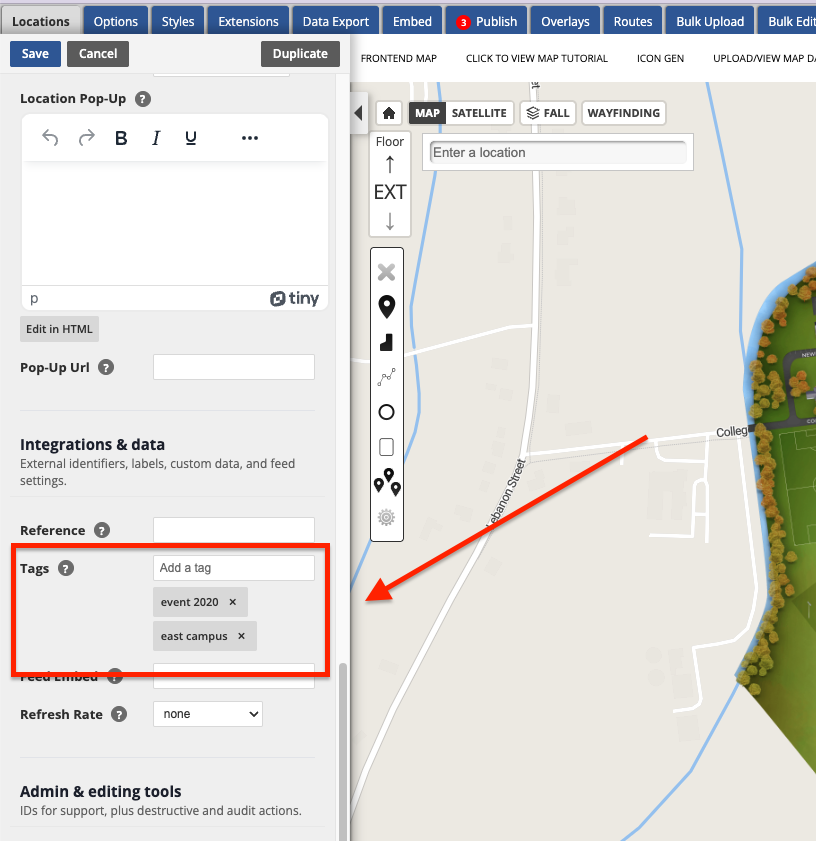
In the Tags field, enter words that group related locations together, such as sustainability, construction, or capital project. Type a tag and press Enter or a comma; you can also paste a comma-separated list.
When you finish adding Tags to a category or location, select Save, then publish the revision when you are ready.
How to Use Tags in Bulk Edit
In Map CMS, select Bulk Edit from the CMS sidebar to open Location Manager
Enter the tag you want to use in the Tags filter, make sure Tags is selected from the dropdown
Location Manager updates to show the locations with that Tag.
You can select and edit one location at a time, or select multiple locations to edit simultaneously.
-
After you have selected your location(s), click the Edit button and select the Field to Edit.
-
With Bulk Edit, you can update Category associations, edit Names and Descriptions, add Images, change Visibility Settings, add Keywords and Tags, and more!
-
After you have made your changes, make sure to Save them.
-
You can Check the boxes for the locations you have edited, which will prompt a new Publish button to appear; alternatively, you can return to your CMS, where the edits will also populate in the CMS' publish tab.
Hint: You may need to refresh the CMS for the edits to appear.
Select and Publish your changes!
Helpful Hint:
Tags are useful for Bulk Edit, and you can add Tags to many locations at once in Location Manager for future filtering and edits.